This applies to: RM, MangoMobile, Propane Meter Interface
This is an INTERNAL ONLY document!Introduction
Using remote tank monitors from a variety of vendors is popular with many customers. Each of these vendors have some unique features, while most provide you with the following:
- Basic tank level reporting
- A Web application that lets you look at what is on hand at any time
- Ability to associate it a customer tank of determined size
- Notifications if something goes wrong
- A portal for your customers to monitor their tank level and usage.
- Guidance on what a customer may run out.
You may elect to you use your vendor supplied tank monitoring in a stand alone manner or you may want to integrate this to your RMA system to help your forecast usage and plan your routes. If you have our optional module for Integrated Tank Monitoring, you get added features:
- Ability to look at most recent tank levels in Mango Dispatch Manager (MDM)
- Added information and accuracy in Mango Mapping when displaying and planning routes
- Customer service reps see tank levels in several places as the retrieve customer information
- Your drivers can see what customers may be running low on their handhelds and react sooner to customer needs with the better visibility.
- Your customers can see their tank levels as they log into Mango Web or Mango Pay.
The balance of this article will be dedicated to the configuration and set up of the monitors.
If you have any questions about the monitors you use and will they work with RMA, then you may want to reference this chart showing what is supported and what features in each product.
https://docs.google.com/spreadsheets/d/1YnmM454A2XZcKbwHYaJcUwWbQH3R2A4ugUe0grFLvRk/edit?usp=sharing
We are frequently adding new data to this table, so check back often to see if there has been an enhancement.
Configuring the Monitors
The first step to using your monitors in RMA is to do the basic connecting. Before you get to this point, you should have worked with your vendor to configure and test your monitors so you know they are working properly. By now you should have a couple of them installed on tanks and reviewed the results for a few day so you know they are working properly and data is flowing through to their web site.
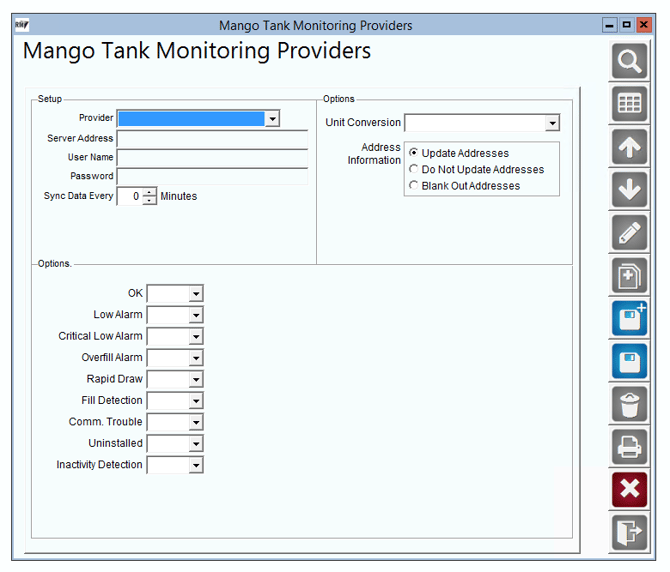
- RMA and navigate to Modules > Mango Tank Monitoring > Providers
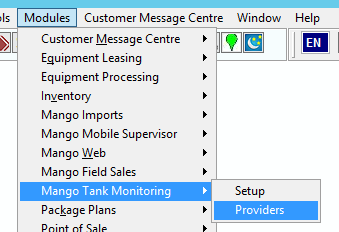
- Select your Provider
- Enter the following information
- Server Address
- User Name
- Password
- Number of minutes to sync data into RMA.
- Under Options you can select
- Unit Conversion
- Us Customary to Metric
- Metric to US Customary
- Address Information
- Update Addresses
- Do not update addresses
- Blank out addresses
- Unit Conversion
- Additional Options
- These Tank Status' allow you to assign an equipment status code to use to indicate the status of your tanks.
- Enter the following information
Remote Monitor Pre Import Setup
Equipment Type
- Navigate to Lists > Equipment > Equipment Type Codes.
- From this screen you will want to select the add Icon.
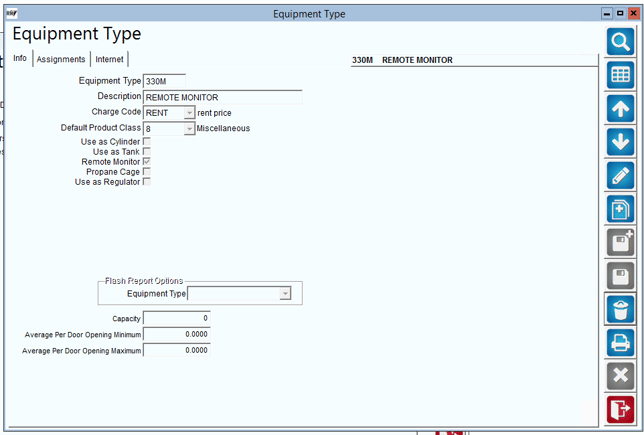
- Enter the following information
- Equipment Type ID
- Description
- Charge Code
- Default Product Class
- Select Remote Monitor
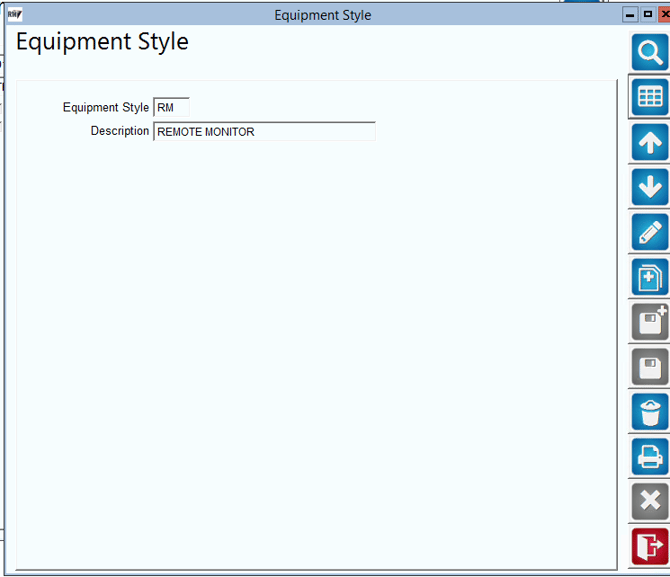
Equipment Style
- Navigate to Lists > Equipment > Equipment Style Codes.
- From this screen you will want to select the add Icon.
- Enter an equipment style id and description
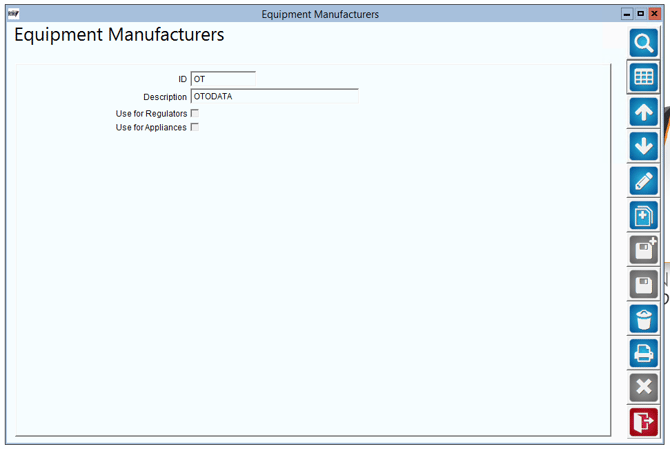
Manufacturer
- Navigate to Lists > Equipment > Manufacturer List.
- From this screen you will want to select the add Icon.
- Enter an equipment manufacturer id and description
Charge Code
- Navigate to Lists > Product Codes > Product Charge Codes.
- You will need to create a charge code for the product that will be used to charge rent for the remote monitor. You will need to enter the following information
- Info Tab
- Charge Code ID
- HH Description
- Pricing Tab
- Price
- Handheld Tab
- Mark as handheld product
- Accounting Tab
- Product Class
- GL Account Number
- Info Tab

Remote Monitors Import Defaults
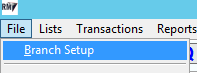
- To import your remote monitors navigate to File> Branch Setup
- Once in Branch Setup navigate to the Equipment Tab, select modify then select Monitor Import Defaults
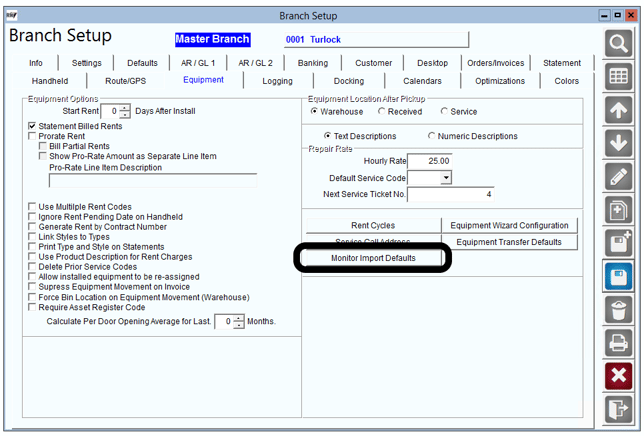
- From this screen you will select your default options for all Remote Monitors that are imported into RMA
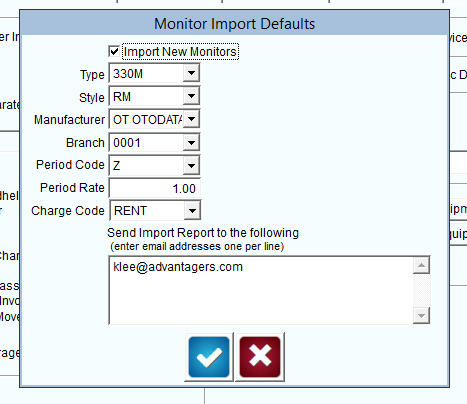
- You will assign the following
- Equipment Type
- Equipment Style
- Manufacturer
- Branch Assignment
- Rental Period Code
- Period Rate
- Charge Code
- Email recipients for all imported monitors
Setting up the Monitors
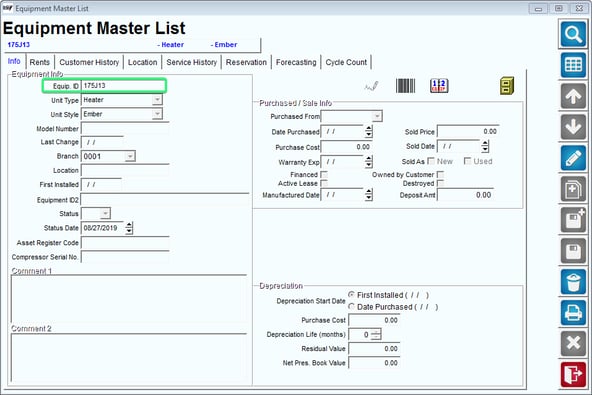
- In RMA, find the equipment the meter is installed on by going to List > Equipment > Equipment Master List and look up your tank. Take note of the "Equipment ID".
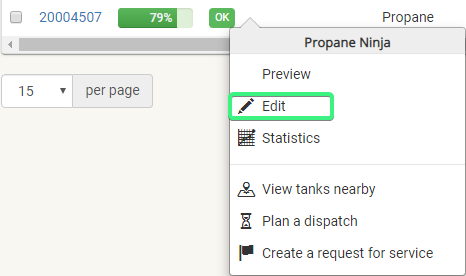
- In the Nee-Vo portal modify the monitor by right clicking it and choosing "Edit"
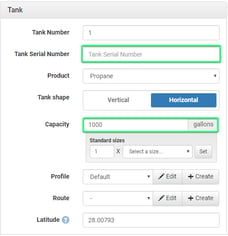
- Under the "Tank" card, put the Equipment ID from RMA in the “Tank Serial Number” field and make sure the proper capacity is filled in as well
- Once completed, click the "Save" button on the bottom right corner of the Nee-Vo portal and go back in to RMA.
- One of the last steps is setting the equipment type to “Remote Meter” so it is accessible in Route by Map. Assign this equipment type to all the remote meter equipment.

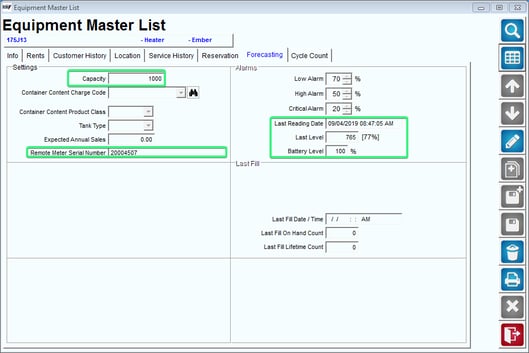
- Once the sync finishes running, you should now see the data from the monitor in RMA under the forecasting tab.
How it Works
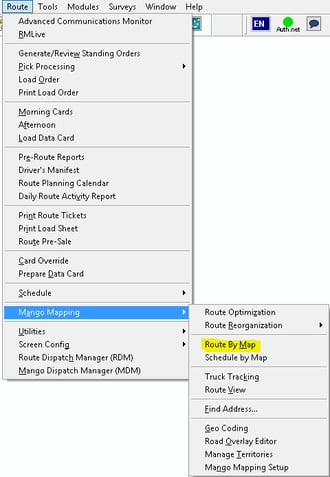
- Now that we have completed the initial setup, we are ready to use the program. Go into Route > Mango Mapping > Route by Map.
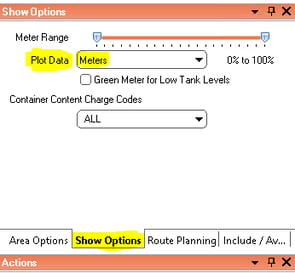
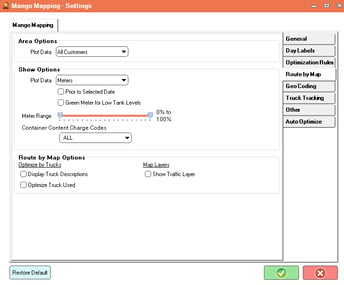
- When the screen opens, in the Show Options tab, choose “Meters”.
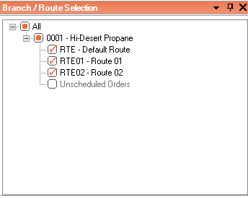
- Make sure to select branches you want to plot customers for.
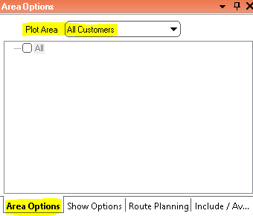
- The last step in the Area Options tab is to choose “All Customers” in the Plot Area dropdown box.
v All Route by Map options and configurations can be pre-configured so you don’t have to set them every time you open the screen. In RMA go into Route > Mango Mapping > Mango Mapping Setup, in the Route By Map tab you can set defaults.
- Click “Plot” to see all the remote meters on the map. This will also show the last reading level data coming from the tank monitor. Once the pins plot on the map, you can do the usual route by map processes to route these customers.
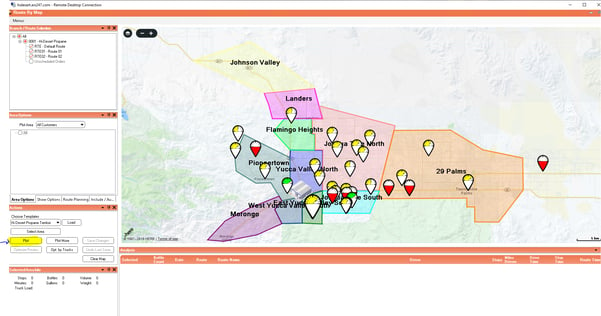
- Clicking on a pin will bring up customer data along with other useful information including:
- Last Service Date
- Tank Capacity
- Last Recorded Date
- Current Level
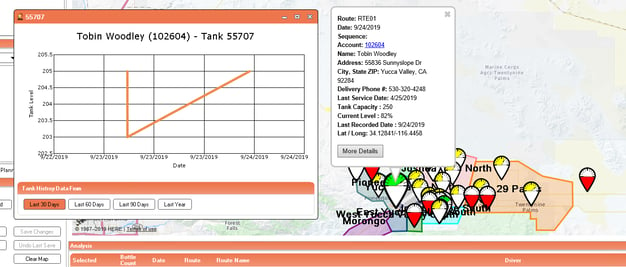
v By clicking More Details you can view the tank history data for different date ranges.
How to Purchase an Otodata Account
- For all inquiries on purchasing an Otodata account, please refer to this contact below:
- Sean Hughes: shughes@otodata.ca