Introduction
This report allows you to monitor the reasons why customers are starting and stopping service with the company. The Starts and Stops Report can be found under Reports > Management Reports > Starts and Stops.
This report is only calculated on new customer information. It is not affected by adding a stop as there is no counter or start/end date on the stops.
Note: Start/End Date available on versions 7.2 R1 and newer.
.png?width=670&height=403&name=1718666168391%20(1).png)
Fields:
Sort Option 1 & 2: The primary and secondary fields to sort by. You can choose from the following categories:
- Account Number
- Date
- Reason
- ZIP Code
- Employee ID
Change Branch: If you are logged into multiple branches, this option may be shown and allows you to re-select the branches to include in the report instead of having to completely exit the report.
Account No: Enter the range of accounts to include in the report.
Date: Enter the range of start dates to include in the report.
Reason: Select the range of Start/Stop Reasons to include in the report.
ZIP Code: Select the range of ZIP Codes to include on the report.
Sales Rep 1, Sales Rep2, Sales Rep3, and Sales Rep 1, 2, 3: Select a level of Sales Rep.
Sales Reps From: and To: Select the range of sales reps (one to three) to include on the report.
Customer Status: Select the range of customer status designations to include in the report (leave the From field blank when not in use).
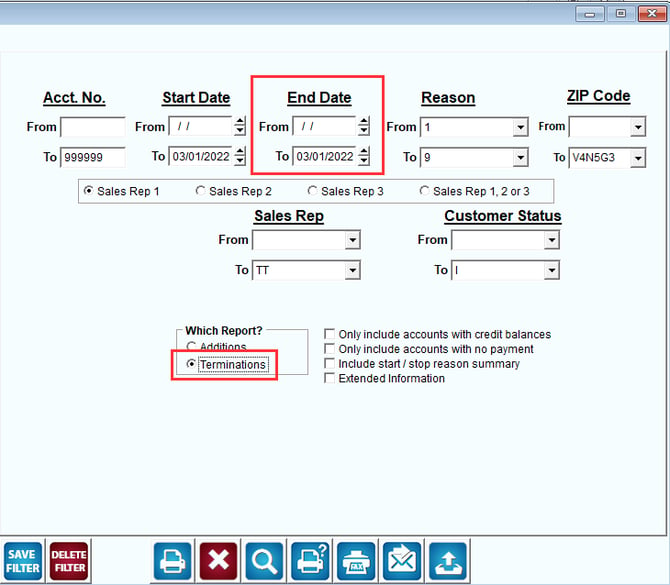
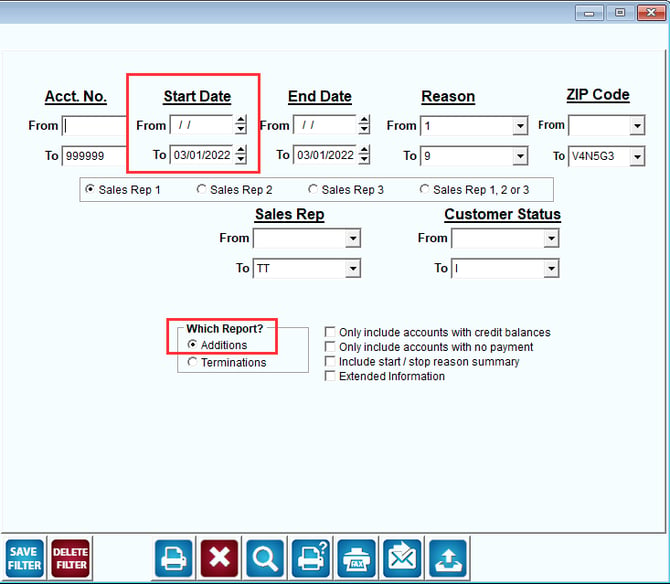
Which Report? Select the type of report you wish to print.
- Additions (Starts)
- Terminations (Stops)
Only include accounts with credit balances: Check this box to include only accounts with a credit balance.
Only include accounts with no payment: Check this box to include only people refusing to pay.
Include start/stop reason summary: Check this box to include a start/stop reason summary at the end of the report.
Extended Information: This option will enable more detailed information to be printed on the report.
NOTE: Extended Information is only included when the Termination report option is selected.
If you are wanting to see Additions for a given date range, then you will only input the Start Dates and leave the End Dates alone.
If you wish to see Terminations for a given date range, then you will only input the End Dates and leave the Start Dates alone.