This applies to: RM, MangoMobile, Propane Meter Interface
This is an INTERNAL ONLY document!Setup
- Open the Advanced Communications Service Configuration (Lists > Routes > Advanced Communications Configuration).
- Click on the Propane/Meter tab
- Change the Provider to OTOData

4. Enter the service address: https://telematics.otodatanetwork.com:4431/v1.0/DataService.svc
5. Copy and paste your API Token from OTOData in the Password field in the Advanced Communications Service Configuration. This can be retrieved from the "Company Profile" page in the Nee-Vo portal.

6. By default the data from OTOData comes through in metric units (unless changed in the OTOData Nee-Vo portal under the company profile page); if you want this to be converted to the Imperial system, set the unit conversion to "Metric to US Customary".

Setting up the Monitors
- In RMA, find the equipment the meter is installed on by going to List > Equipment > Equipment Master List and look up your tank. Take note of the "Equipment ID".

2. In the Nee-Vo portal modify the monitor by right clicking it and choosing "Edit".

3. Under the "Tank" card, put the Equipment ID from RMA in the “Tank Serial Number” field and make sure the proper capacity is filled in as well.

4. Once completed, click the "Save" button on the bottom right corner of the Nee-Vo portal and go back in to RMA.
5. One of the last steps is setting the equipment type to “Remote Monitor” so it is accessible in Route by Map. Assign this equipment type to all the remote meter equipment.

6. Once the sync finishes running, you should now see the data from the monitor in RMA under the forecasting tab.

How it Works
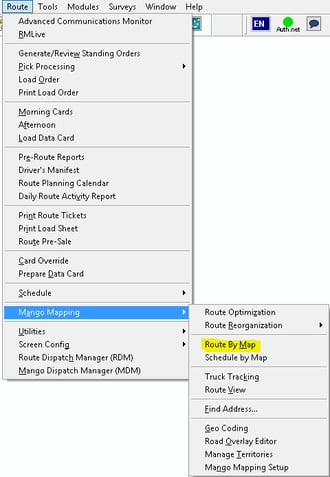
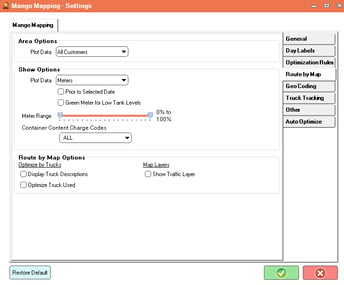
- Now that we have completed the initial setup, we are ready to use the program. Go into Route > Mango Mapping > Route by Map.
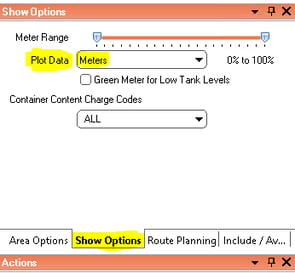
2. When the screen opens, in the Show Options tab, choose “Meters”.
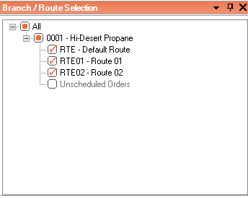
3. Make sure to select branches you want to plot customers for.
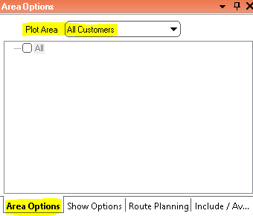
4. The last step in the Area Options tab is to choose “All Customers” in the Plot Area dropdown box.
5. All Route by Map options and configurations can be pre-configured so you don’t have to set them every time you open the screen. In RMA go into Route > Mango Mapping > Mango Mapping Setup, in the Route By Map tab you can set defaults.
6. Click “Plot” to see all the remote meters on the map. This will also show the last reading level data coming from the tank monitor. Once the pins plot on the map, you can do the usual route by map processes to route these customers.
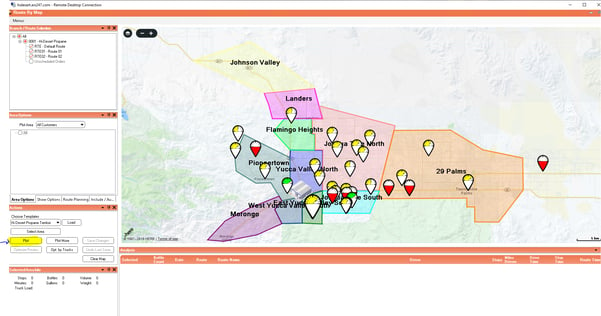
7. Clicking on a pin will bring up customer data along with other useful information including:
- Last Service Date
- Tank Capacity
- Last Recorded Date
- Current Level
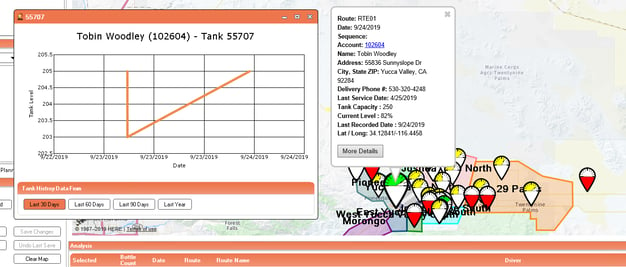
By clicking More Details you can view the tank history data for different date ranges.
How to Purchase an Otodata Account
- For all inquiries on purchasing an Otodata account, please refer to this contact below:
- Sean Hughes: shughes@otodata.ca