Introduction
The Route Manager software provides several ways you can customize product prices for your customers. This chapter will cover the following pricing methods: Standard Price, Price Levels, Default Product Pricing, Cost Plus Pricing, Price Lists, Promotional Price Lists, Quantity Pricing, Customer Level, Product Level, List Level, Product Group Discounts. As these pricing methods work together to provide you with a flexible program, it is important that you understand the various methods and their priority when determining the proper price for your customers as you sell your products.
Standard Price
Every product you enter into Route Manager will have a Standard Price associated with it. Typically, this is the highest price you charge for the item. If the customer is not assigned to any of the alternate pricing options, the Standard Price will be used. The Standard Price is entered under Lists > Product Codes > Product Charge Codes, on the Pricing tab. Enter the price in the ‘Default’ box.
When you add a product to an invoice, the Default price will be assumed unless any of the additional pricing methods discussed in this document are being used.
Default Product Pricing
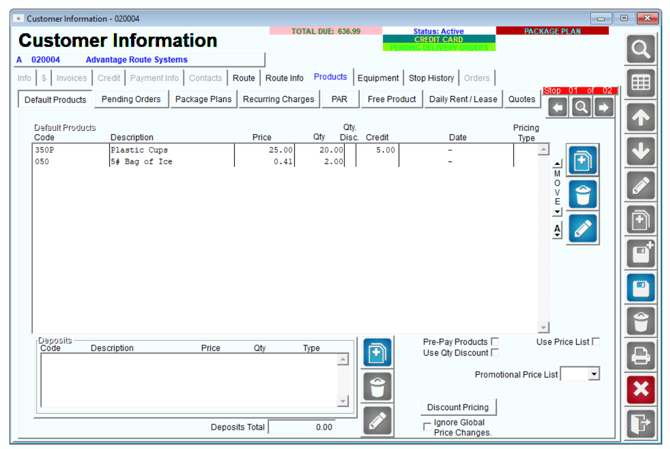
Products can be assigned to each account directly at an agreed upon price with the customer. This will override any Standard and Price Level price established, and will only change if the item is removed or modified on the account.
Assign products directly to an account under Lists > Customer Information, on the Products tab. In modify mode, select the Add key next to the Default Products section to add products to the account manually.
Select the product that you would like to add to the customer’s account, and enter the price and quantity that will be used. Click OK and repeat this process until all of the desired items have been added to the account.

Once all of the items have been entered, click Save.
Advanced Pricing
If you are trying to assign a price level to a customer account, follow the steps below.
Navigate to Customer Information > Products > Default Products. In edit mode, select the Advanced Pricing button which looks like a price tag.
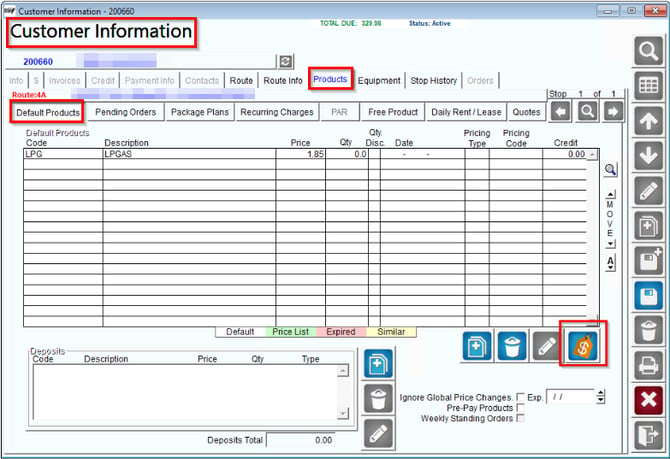
From there, you will see this screen:
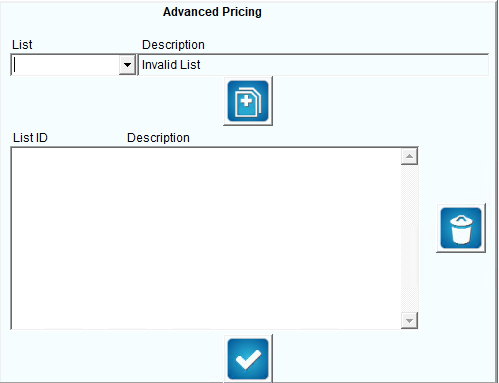
Select “List” and choose from the dropdown menu, which will also add an automatic “Description”. Then, select the “Add” button.
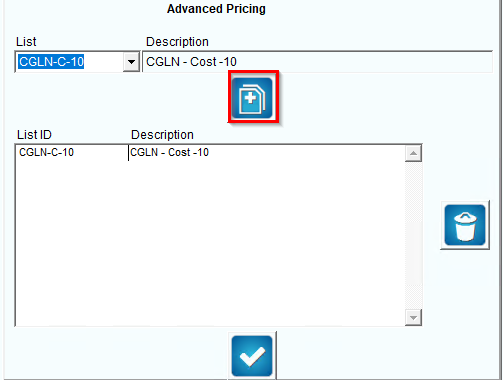
If you would like to discard this, select the Trash Bin icon to the right. If you would like to save this, select the blue checkmark at the bottom of the screen.
Product Group Discounts
Product Group Discounts allows you to discount the price for products purchased by your customers. This option differs from the Quantity Discount Pricing option, as the discounts are based on combined products purchased as a group, not per product.
EXAMPLE: Product Group ‘X’ is assigned to all of your coffee products. At the time of delivery, if the customer purchases more than 15 items assigned to this group, they will receive a 10% discount on the items — only items assigned to Product Group ‘X’ will qualify for a discount.
To set up Product Group Discounts, four areas of the program need to be updated:
- Product Group Codes
- Product Charge Codes
- Route Master
- Handheld Class
Each item is covered in detail within this section.
Product Group Codes
Product Group Codes are generally used for filtering products. This option will also be used for Product Group Discounts and can be found under Lists > Product Codes > Product Group Codes.
- Create at least one Product Group Code that will be assigned to your products.
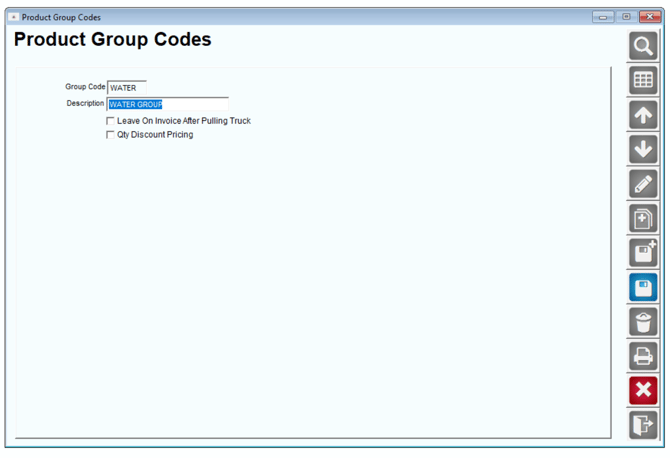
- Select the option ‘Qty Discount Pricing’ and enter the desired quantity and discount (%) information.
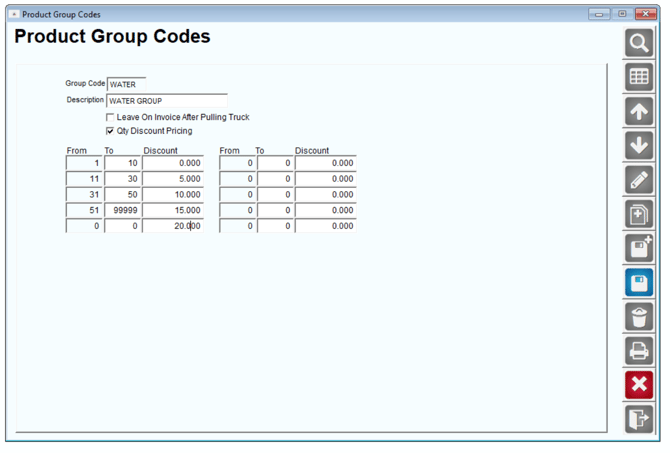
In the example above, ‘Water Group’ has been created, and the discount and quantity information is entered as:
- 1-10 products = standard rates.
- 11-30 products = 5% discount.
- 31-50 products = 10% discount.
- 51 and above = 15% discount.
- Save your changes and repeat these steps if you would like to use more than one Product Group Discount.
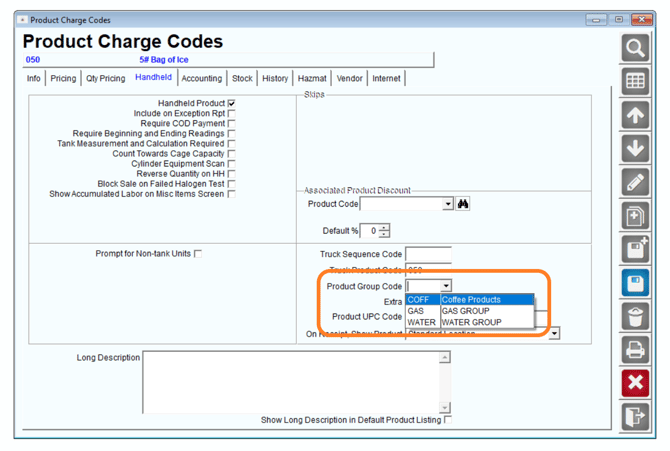
Product Charge Codes
In order to use Product Group Discounts, the group(s) created will need to be assigned to the individual products that qualify for a discount.
- Navigate to Lists > Product Codes > Product Charge Codes, and select the Handheld tab.
- Click Modify and assign the new Product Group to each product that will be included in the current discount.
Route Master
The Route Master screen controls the Product Group Codes that are sent to the handheld. Navigate to Lists > Routes > Route Master, and select the Handheld tab.
If you are using the Handheld Product Group option for filtering products currently, make sure that any new Product Group Codes created are set to ‘Yes.’ If you are not using the Product Group Codes for anything other than discounts, you can leave all of the Product Group filters defaulted to ‘No.’
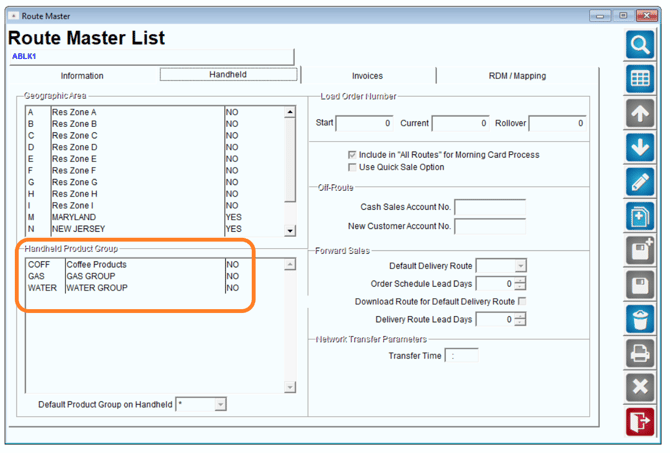
NOTE: In most cases, you should leave all of your Product Groups defaulted to ‘No,’ this allows you to use the discount feature without filtering products out of your handheld.
Handheld Class
For each Handheld Class in Route Manager, a new option will need to be enabled in order to use Product Group Discounts on the handheld.
Browse to Lists > Routes > Handheld Class, and choose the Sales Rules tab.
Click Modify and select the option ‘Allow Product Group Discounts’.
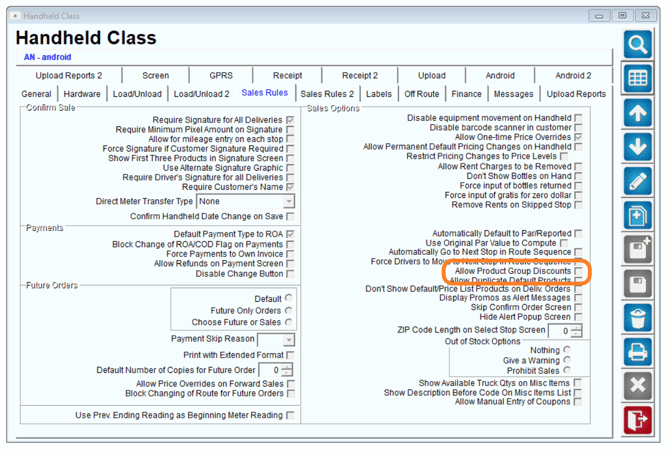
Repeat this step for each Handheld Class that will use Product Group Discounts.
Customer Information
You are also able to decide who gets Group Discounts on a customer level. In order to enable it for a customer, you must go to the Lists > Routes > Customer Information, and choose the Products tab.
Click Modify and select the option ‘Use Qty Discount’.

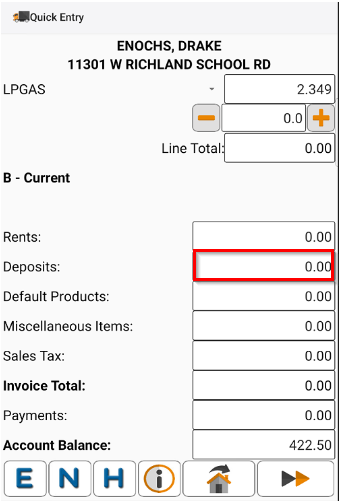
Daily Processing – Handheld
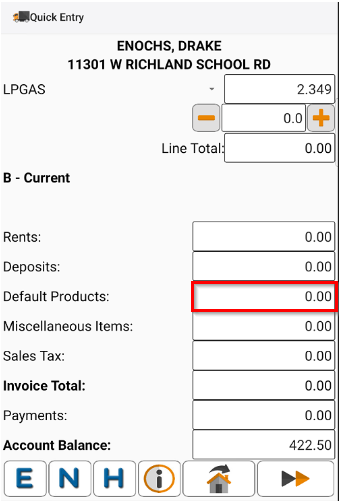
When the driver enters a quantity that qualifies for a discount on the handheld, the amount being discounted will be displayed on the Deposits/Discounts line of the Quick Entry screen:
![]()
A customer will also qualify for a discount when the combined quantity of more than one item (assigned to the same Product Group Code) meets the required quantity:
![]()
Daily Processing – Desktop
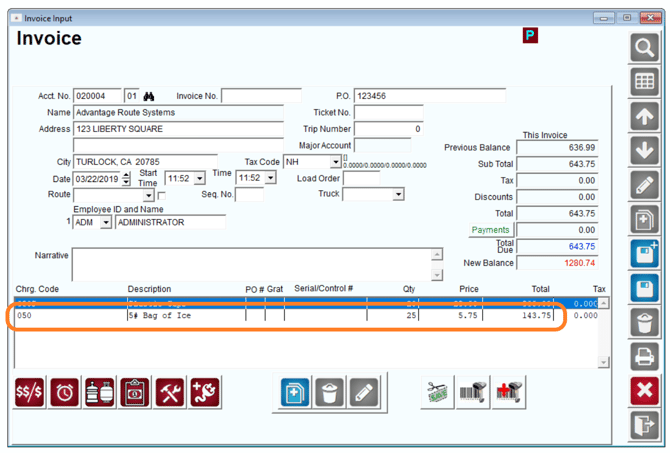
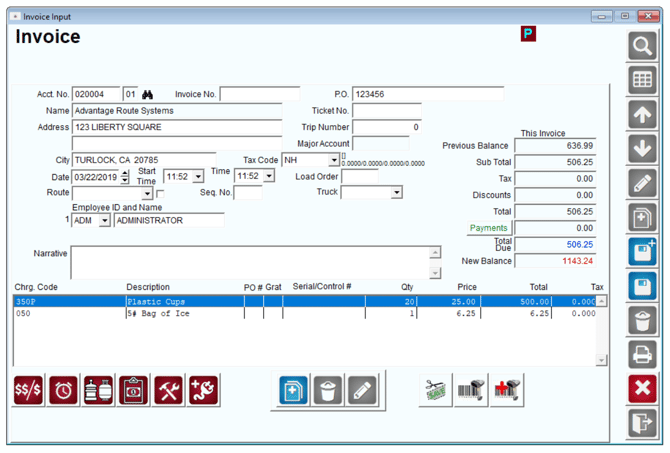
When a new invoice is created that qualifies for a discounted rate on the desktop, the amount being discounted will be calculated when the invoice is saved.
A standard invoice is displayed below; the combined quantity (13) of both items qualifies for a discount.
Once Save is selected, the amounts are recalculated at the discounted rate: