Overview
Route Manager offers a flexible language option that is simple to work with and includes a dozen different language choices. In addition, every word or phrase displayed on the screen can be modified to suit the needs of each company. Even if you don't need a "foreign" language, you may want to customize terms that you use. Whether it's to add a real name to user-defined fields or change every place you have the word "truck" to "big boom", this is the place to do it. This chapter will guide you through the process of loading and customizing language options.
Prior to Getting Started
It is recommended that the user editing the language file is someone that has technical experience and has advanced working knowledge of Route Manager — it is simple to change text, but can create headaches if not done properly.
A backup should also be created of the Data and Language folder prior to your changes in case you will need assistance to revert back to your previous language setup.
- Note: You can run a backup by going to File>Backup/Restore>Backup Data files.
If there are multiple languages spoken within the office, each user's workstation can create their own custom language for their RMA.
Getting Started
Essentially every word and phrase appearing in the program can be modified or translated. There are two methods available for editing language options:
- Language Maintenance: This option allows you to load alternate languages, and view and edit the language table. This is the primary way to perform language changes.
- Direct Edit using CTRL+W: This option allows you to make on-the-fly language changes by placing the mouse cursor over a word or phrase displayed within the program, and holding down CTRL+W.
Each language editing option is discussed in detail within this document. You will usually want to use both methods as you customize the language for your software.
Language Maintenance
Follow the steps below to load or customize a language file. Each option is discussed separately.
Loading a Language File
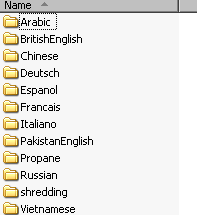
By default, the language already displayed in your Route Manager program was selected during the installation of the program. If additional language files need to be used in the system, they can be downloaded (all downloads found at bottom of this page). All languages provided are located in your RMA>Languages folder. Here is a sample of what's available.
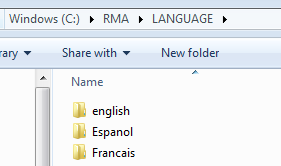
Once you have downloaded or copied the language folder of your choice, it will need to be placed within the ‘Language’ folder of your RMA directory.
SINGLE USER MODE REQUIRED: Once the language folder has been added, you must perform a data rebuild. In RMA, browse to File>Rebuild Data Folder. Click yes on the prompt. Your RMA will activate single user mode.
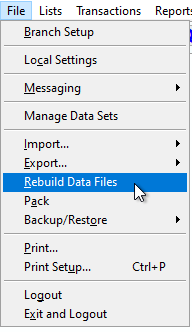
Click yes on the prompt. Your RMA will activate single user mode. 
Enable the options 'Rebuild Tables from C:\RMA\TABLES.ZIP', 'Fill Languages' and 'Force Rebuild of ALL tables'. Click the checkmark. It is highly recommended that you create a backup when prompted during this step.

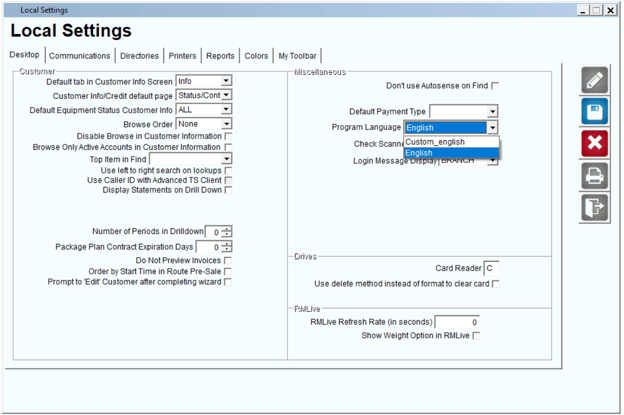
To load the new language file on the current workstation, browse to File > Local Settings, and select the Modify key in the Desktop tab.
Choose the new language file from the ‘Program Language’ drop-down list and click Save.
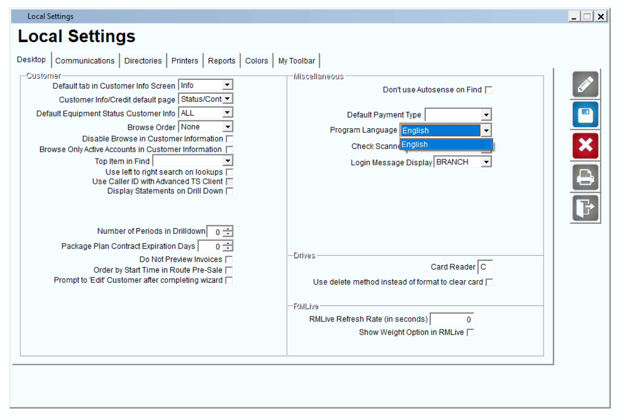
Once you exit from the Local Settings screen, the new language will be updated.![]()
Repeat the steps above on each workstation that will use the new language file. In addition, on the tool bar, you will be able to identify the language by the blue square showing the first 2 letters of the language. This will show the language to be edited.
Customizing a Language File
Use this option to customize the current language file. This can be helpful for updating text to fit closely with your company’s terminology.
Navigate to Tools > Language Maintenance, and click the ‘OK’ button on the warning screen.
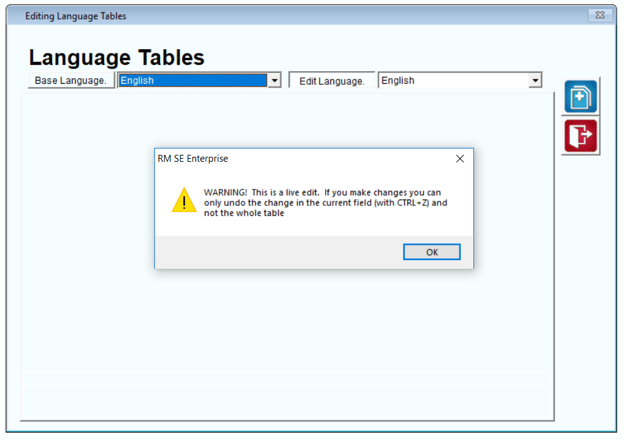
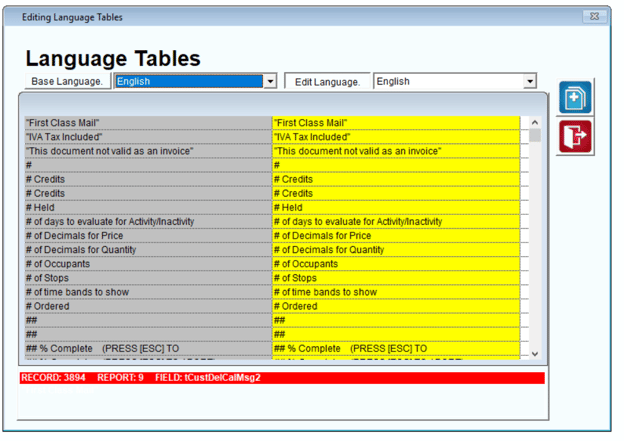
The Language Table screen is split into two sections: Base Language and Edit Language.
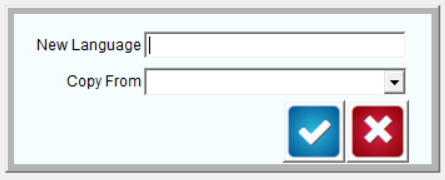
To create a custom language file, create a new Edit Language by selecting the Add key on the right side of the screen.
.png?width=624&height=442&name=1670542881447%20(1).png)
Give your new language file a name, and select the Base Language that will be applied to the new language. Click OK to continue.
Note: Make sure your new language file does not have a space in the name.
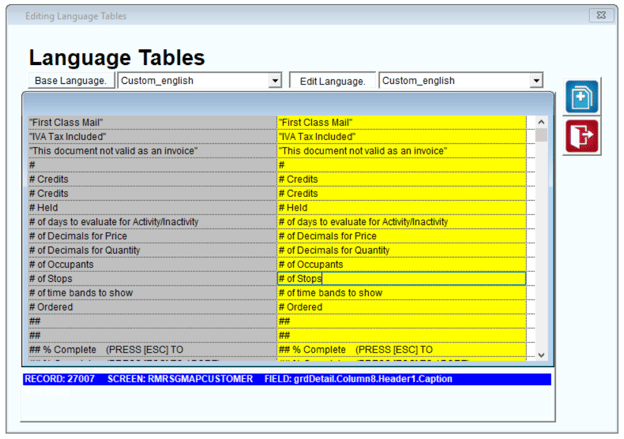
Your new language file will automatically be loaded on the Language Tables screen.
![]()
Scroll through the list of items, or use CTRL+F to search for a specific term. Once you have selected an item that you would like to update, click in the yellow text field to modify the Edit Language — the Base Language will always remain the same, for reference to the original text.
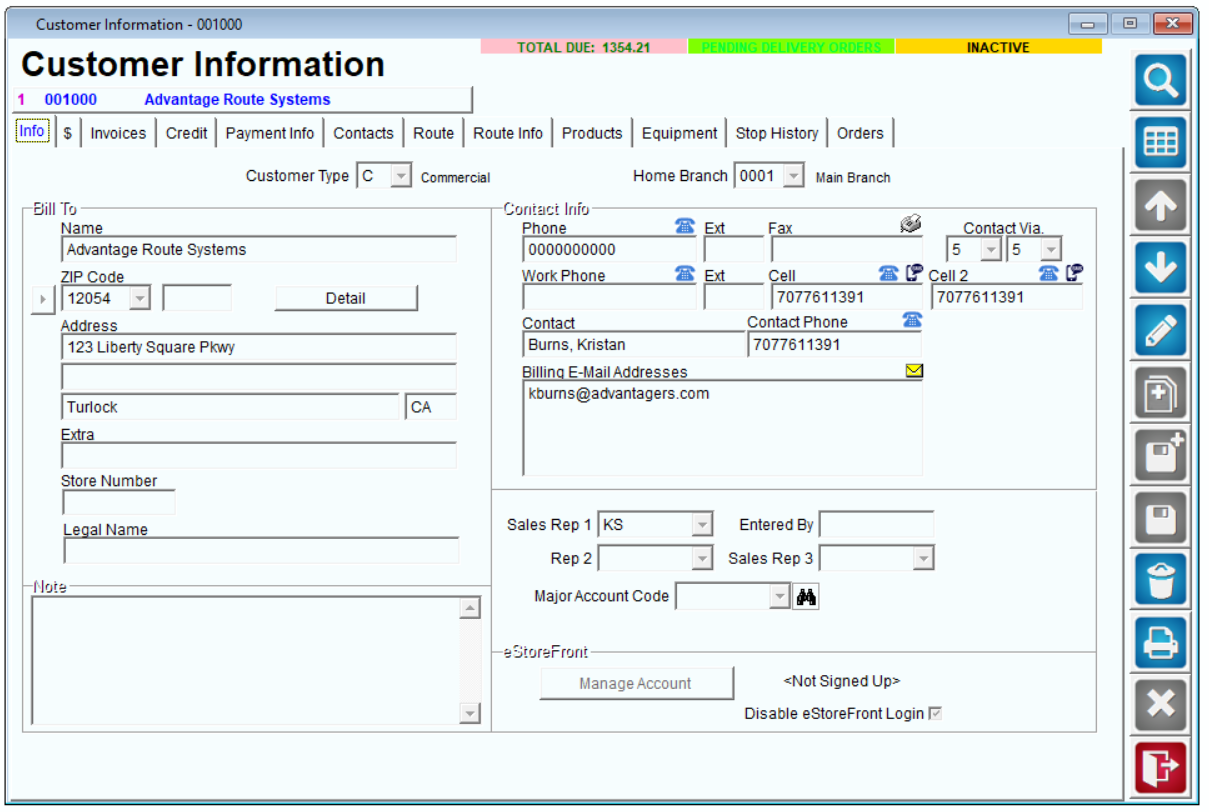
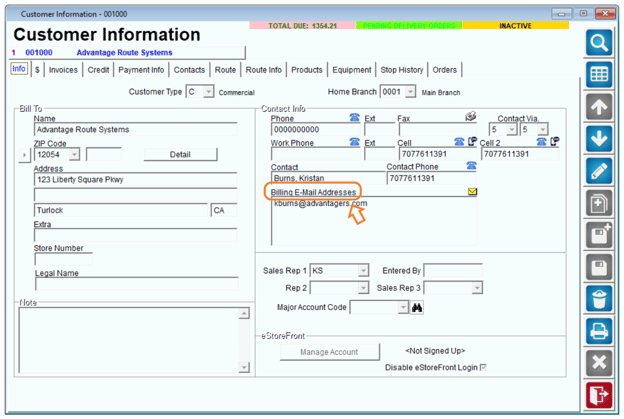
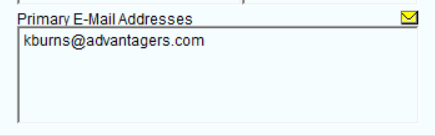
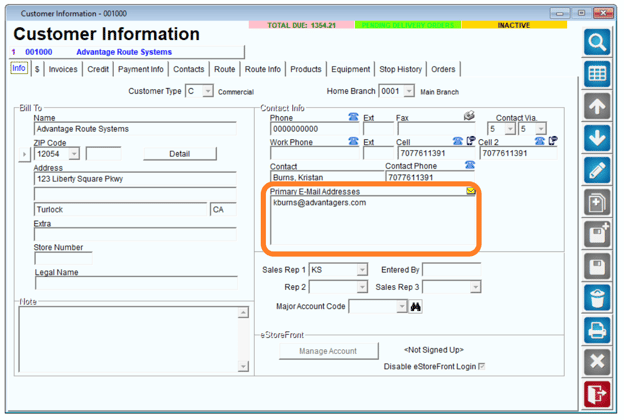
In this example, the term ‘Major Account Code’ is being updated to display ‘Priority Account’ within the Customer Information screen.
The screen that each change will apply to is displayed on the bottom of the Language Tables screen:
![]()
Repeat these steps for each item that you would like to update, and exit the Language Maintenance screen.
To load the new language file on the current workstation, browse to File > Local Settings, and select the Modify key.
Choose the new language file from the ‘Program Language’ drop-down list, and click Save.
Once you exit from the Local Settings screen, any custom language information will be displayed.
Repeat the steps above on each workstation that will use the new custom language file.
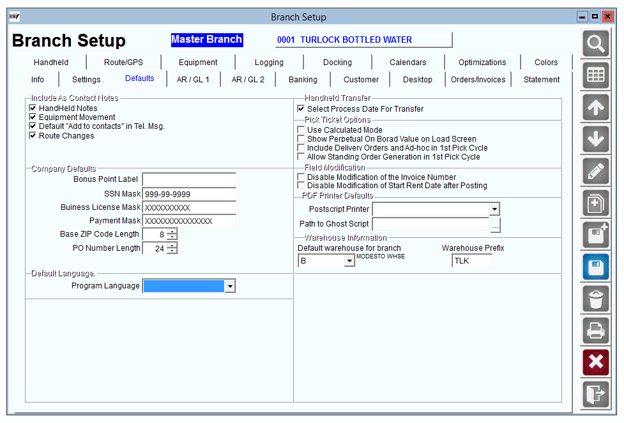
You can also set this as a default within Branch Setup for all users under File> Branch Setup> Defaults.
Language Display on the Module Bar
The first two letters of the language being used at each workstation is displayed on the system Module Bar: ![]()
Double-click on the language option to edit the language setting within Local Settings.
NOTE: When creating new language files, try to use a naming convention that defines the file based on the first two characters (i.e., BE for British English). This is helpful for reference on the Module Bar.
Direct Edit using CTRL-W
You can manually update language on most of the program screens by placing the mouse cursor over the displayed text and pressing CTRL+W.
In the example below, the ‘Text 2’ field is to be changed to ‘Reference Number’ under the Credit tab within Customer Information.
- Place the mouse pointer over the field to be modified.
- Enter CTRL+W on your keyboard.
.png?width=413&height=151&name=1670542881965%20(1).png)
- Enter the new description that you would like to display, and click the Save key.
The new description will now be displayed.
This option will edit the language file that is currently loaded on the machine. Be sure you have the desired language. If you do it to "English", the next time you upgrade your software, you will lose and edits you have made.
NOTE: To restrict users from changing language using CTRL+W, you can restrict access to the ‘Language Maintenance’ option within Lists > Employee Setup > Security Level Codes.
Tips and Pointers
This section provides you with tips and pointers that may be helpful when using the Language Maintenance screen.
- The Base Language is the original language table currently being used. After an update or upgrade, the Base Language may contain new fields.
- The Edit Language can always be modified.
- If you would like to sort the list by the Edit Language, simply click on the Edit Language button and the sort order will be updated. Use the same method for sorting by the Base Language.
- The file information displayed on the bottom of the screen indicates the area of the program that will be affected by the language change. Red indicates that the item is displayed within a report; Blue indicates a display screen.
- CTRL+F can be used to search through the language file.
- Grant only administrators the ability to edit language by disabling access to the Language Maintenance option within each Security Level Code.
Language Packs
Download any of these available Language Packs:
- Arabic: Arabic.zip
- Australian English: Australian.zip
- British English: BritishEnglish.zip
- Chinese: Chinese.zip
- Deutsch (German): Deutsch.zip
- Espanol (Spanish): Espanol.zip
- Francais (French): Francais.zip
- Italiano (Italian): Italiano.zip
- Pakistan English: PakistanEnglish.zip
- Russian: Russian.zip
- Vietnamese: Vietnamese.zip
We also have an English Language Pack that uses terminology for the Metric measuring system (ie. Check is now Cheque, Miles is now KM, Gallons is Litres, etc):
- Metric System: Metric.zip
We also have a couple Language Packs specific for certain industries:
- Propane Industry: Propane.zip
- Shredding Industry: shredding.zip