Introduction
The Pre-buy Products feature allows customers to pre-buy propane at a set price for a set amount of gallons, then will be delivered at a later date.
How do I set up Pre-Buy?
Setting up Pre-buy Products is a simple process that involves two steps:
- Create a new Pre-buy Credit Code.
- Associate the Pre-buy Credit Code with a corresponding Propane Product Charge Code.
The following section will guide you through this process.
Pre-Buy Credit Charge Codes
You must create a Pre-buy Credit Code for each propane product charge code that you are allowing your customers to pre-buy for.
Creating a Pre-buy Credit
Add each credit code to the system within Lists > Product Codes > Product Charge Codes. In the following example, product code ‘00158’ has been created for ‘Pre-Buy Propane'.’
NOTE: Do not establish any prices for this item. This product must be marked as a handheld product.

On the Accounting tab, the prepay credit code must be assigned to a Liability account in the ‘G/L Account number’ field.
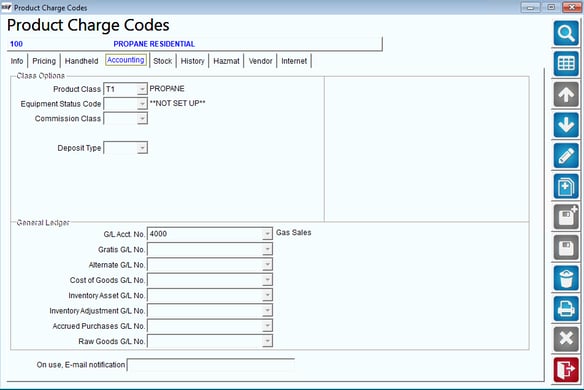
NOTE: If you do not have an available Liability account, you must exit this screen and create one under Lists > Account Setup > General Ledger Setup prior to continuing.


Repeat these steps for each pre-pay credit code required.
Assigning a Pre-Buy Credit
Navigate to an item that you will be offering for prepay, and select the Modify key. Select the ‘Pre-Pay Product’ box on the Info tab, and choose the corresponding Pre-buy Credit Code from the dropdown list.
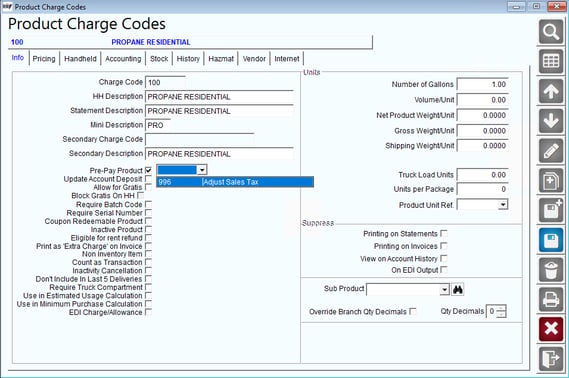
Save your changes and repeat this step for each prepay item.
When a credit code is properly linked to a prepay item, information similar to the following will be displayed on the Info tab:
Pre-buy Customer Setup and Usage
Setting up and processing the Pre-buy feature for your customers can be accomplished in four easy steps:
- Establish Default Products
- Create pre-buy invoices
- Post transactions
- View pre-buy detail
Each item is covered in the order listed.
1. Establish Default Products
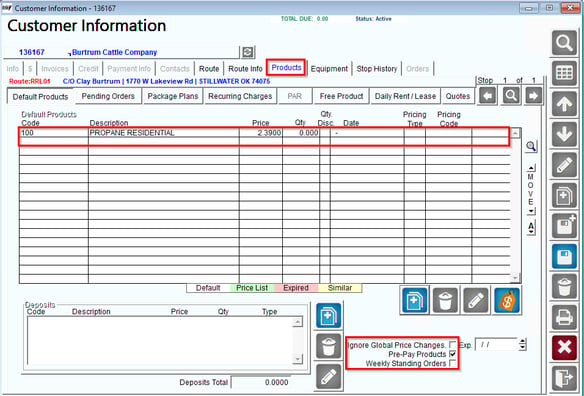
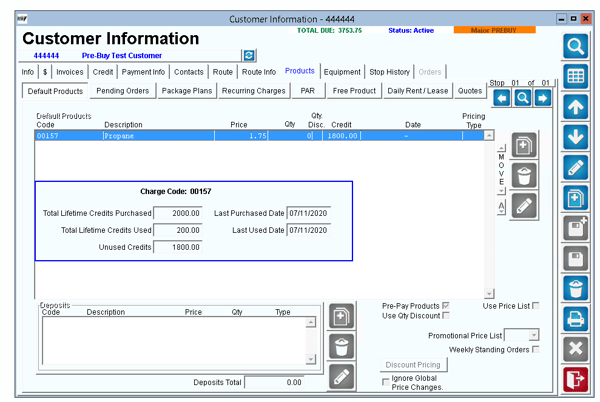
Assign each pre-buy product (not the Credit Code) to the customers that qualify within the Products tab of the Customer Information screen. The example account below has been assigned the ‘Propane’ pre-buy item created earlier in this document.
Additionally, select the ‘Pre-Pay Products’ box to the right of the Default Products area to enable the prepay option on their account.
NOTE: Pre-buy credits can only be sold to a customer if the prepay item is assigned to their account as a Default Product.
Repeat this step for each prepay item desired, and click Save.
2. Create Pre-Buy Invoices
When a customer would like to purchase pre-buy credits, an invoice must be created within the Invoices and Adjustments screen on the desktop.
Add the desired pre-buy credit code to the invoice, and enter the number of credits being purchased in the Qty field.

NOTE: When the pre-buy credit code is added to the invoice, the system will automatically use the price of the associated product code.
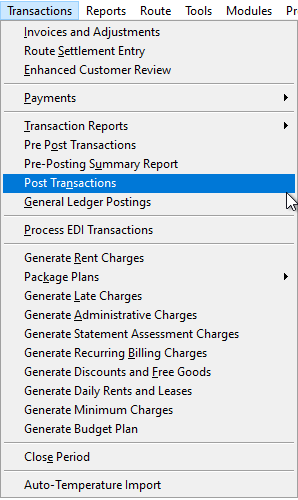
3. Post Transactions
In order for the pre-buy purchase to be reflected on the customer’s account, the invoice will need to be posted.
Navigate to Transactions > Post Transactions to post the prepay credit invoice.
4. View Pre-Buy Detail
To view pre-pay credit detail on each customer’s account, navigate to Lists > Customer Information, and select the Products tab. Right-click on any of the pre-pay items assigned to the account to view the detail screen (example below).
The Pre-pay (Pre-buy) Quantities Report allows you to view detailed purchased and redeemed prepay credit information per customer.
Navigate to Reports > Accounting Reports > Sales > Prepay Quantities Report.
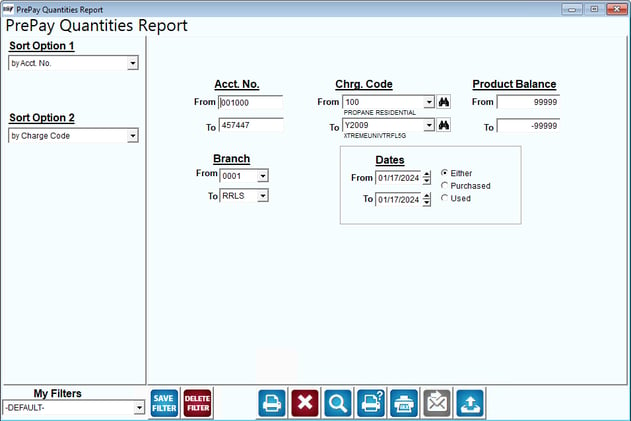
Information that the report can provide:
- Remaining and redeemed credits.
- Liability per item.
- Customers who have gone over their prepaid quantities and owe the company.
NOTE: This issue can occur if the Post Transactions process is not completed daily.
Refer to User Guide B for a definition of each option on the report screen.
Managing your Pre-Buy accounts is a daily process. This section will guide you through the various adjustments that can be made throughout the system.
Removing Pre-Buy from a Customer
To disable the prepay feature on a customer’s account, you can simply uncheck the ‘Pre-Pay Products’ option within the Products tab.

NOTE: Any previously purchased credits will remain on the account, and prepay will resume if the ‘Pre-Pay Products’ option is selected on the account again. Additionally, any Default Products with associated prepay credits cannot be removed until the credit total is reduced to ‘0.’ Refer to the Prepay Credit Adjustment section below for information on making adjustments.
Single Account
Access the "Adjust Pre-pay Credit" tool by going to Tools > Administration > Pre-Pay Adjustments.
To make a manual adjustment to an account, or remove their credits entirely, enter the same account number in the From/To fields. Enter the prepay code that you will be adjusting on the account, and select the ‘Adjust Account Pre-pay Credit’ option. In the Qty field, enter the exact number of credits you would like to remain on the account (i.e., enter ‘0’ to remove all credits).

Click OK to complete the process.
Account Transfer
To transfer credits from one account to another, enter the account numbers in the From/To fields, and enter the prepay code that you will be adjusting in the Product Charge Code field. Select the ‘Adjust Account Pre-pay Credit’ option, and enter the number of credits to transfer in the Qty field.

Click OK to complete the process.
Summary
The Pre-Buy Propane Products feature allows you to offer your customers a simple credit program that offers them convenience, and allows your company to receive an additional revenue stream without making deliveries.