Overview
As a business, you will run into the need to mass contact your customers for changes with product pricing, promotions, closures etc. Sometimes, these occasions will only affect a specific group of customers rather than the standard criteria range that we provide in our Generate Messages Marketing window.
In this event, you can use our Customer Message Centre Import tool to mass message the customers from a specified excel spreadsheet.
Use the following process below, to send out these messages.
Setup
In order to create your spreadsheet list for customers to be contacted, you will need to pull the spreadsheet template from the Customer Message Centre.
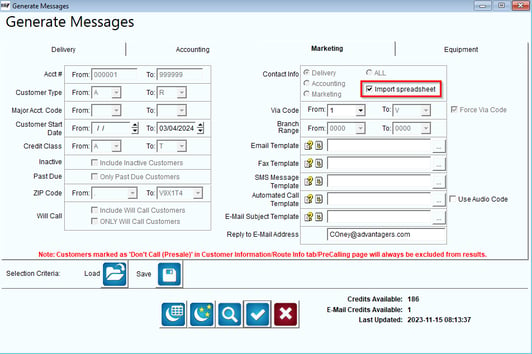
- Go to Modules>Customer Message Centre>Generate Messages>Marketing tab.
- Check the "Import Spreadsheet" box.

- Click the Blue Checkmark at the bottom to generate the spreadsheet template.
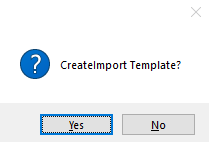
- You will then receive a prompt to create the import template.
- Select "Yes" on the prompt.
- Next, you will be asked if you would like to create a Verbose import or a Brief import.
 Verbose Import will be needed if you are using short codes in your email/SMS message.
- i.e. Hello, your next delivery will be NXDDDAY_DAY.
- Brief Import can be used if you are not using any short codes in your email/SMS message.
- Select "Yes" to use Verbose.
- Select "No" to use Brief.
- You will then have a pop up window that will show you the file name and location.
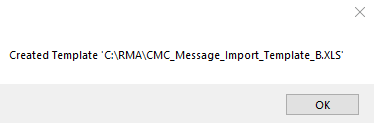
- Make sure to take note of this file name and location so you can locate it once you select "OK".
Note: You cannot name the file yourself. It will auto populate the name for you.
13. Open the File Explorer on your workstation.
14. Go to the file path given when the template was created: C:\RMA\CMC_MESSAGE_IMPORT_TEMPLATE_B.XLS
15. Double click on the file to open it.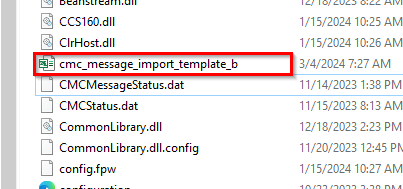
16.Fill in the columns with the account information for all accounts you want to be notified on this list.
Verbose Template Example:
NOTE: Verbose export only requires that the cust_id field and message type field (email-cust_email, voice-cust_phone, sms-cust_c_ph) filed in to generate.
Brief Template Example:

NOTE: All fields have to be filled in for the Brief Template.
17. Once filled in, save the file and rename it so that you can keep this list on record for future reference.
Note: If you do not rename the file after making changes, the file can be overwritten in the future if you were to run this process again since the process will always create the same file name when outputting the template.
Running the Mass Process
Once your list has been created, the next step would be to import your customer list template and send out the messages.
- Go to Modules>Customer Message Centre>Generate Messages>Marketing tab.
- Click on the "Import Spreadsheet" option.
- Choose your message Via Code (message type).
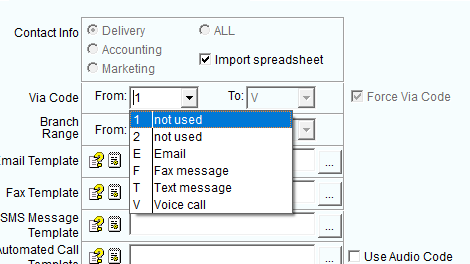
- Choose the proper template for the Via Code type selected.

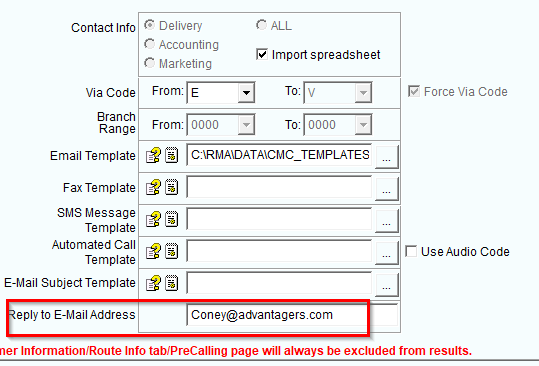
- Input the proper reply address:
- Make sure the excel spreadsheet is not open on the desktop before you run the process. If open, it will crash the process.
- Once everything is set, select the Blue Checkmark.
- Select "No" on the prompt to CreateImport Template.

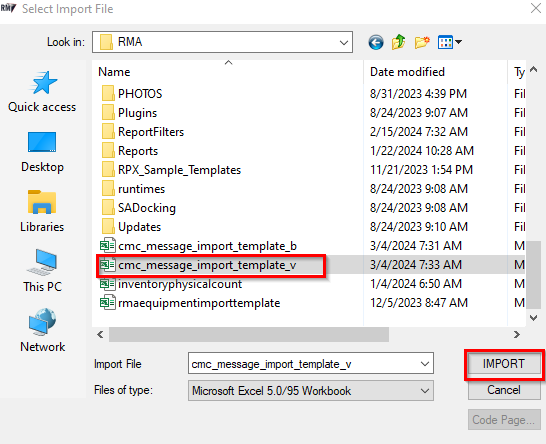
- Next, select your saved template.
- Click "Import" once you are ready to send the messages.
NOTE: As soon as you select, "Import" the messages will begin to generate. You cannot abort the process once it has started.
11. A prompt to review the report will populate. Select yes to see the list of customers that were contacted.

12. You can also review the messages that went out through the Modules>Customer Message Centre>Message Status Monitor.
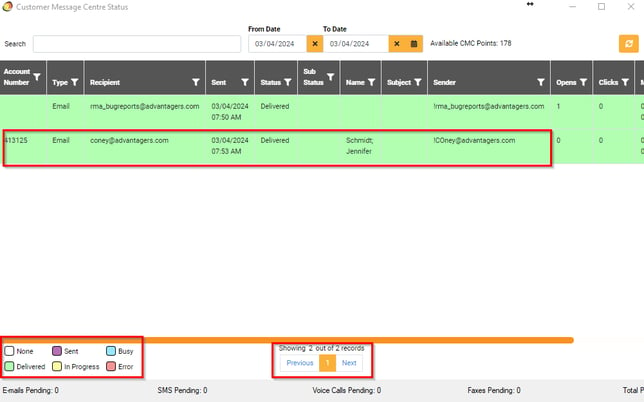
Message Status Report
Review all messages that were sent out through our Customer Message Centre Status Monitor.
- Go to Modules>Customer Message Centre>Status Monitor.
- All messages for the current day will populate on the window first.
- Choose the last page to see the most recent messages that went out.
- Check the message status color at the bottom left hand corner of the window.