Introduction
Account Deposits in RMA is a feature that lets you collect money from a customer and hold that as a deposit until they either quit or it is no longer needed to hold the money - perhaps their credit has improved.
This article will show you how to set up the deposits and process them. There is a report so you can track the deposits by customer.
Setup
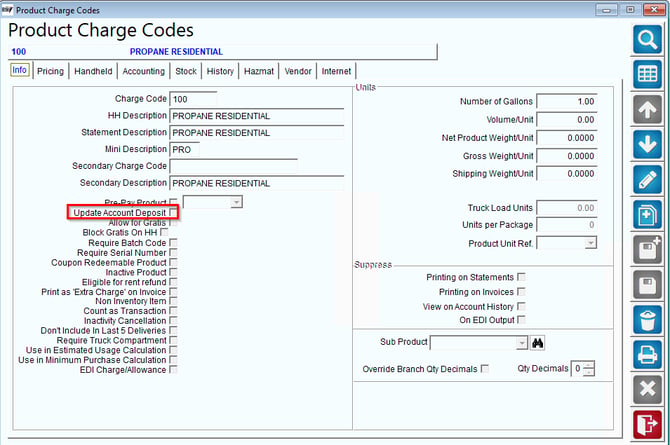
in order to use this feature, you will need to set up a product that will affect the account in Customer master. Go to Lists > Products > Product Charge Codes and create a new product. you can choose any class, group, etc. but it is imperative that you tick the box Update Account Deposit. if you always collect a minimum of $50, you can put that price into the code. you can always over ride the price as you charge a customer a deposit.
With the product code set up, you are now ready to collect a deposit for a customer and track it in the RMA system.
Creating and Posting Transactions
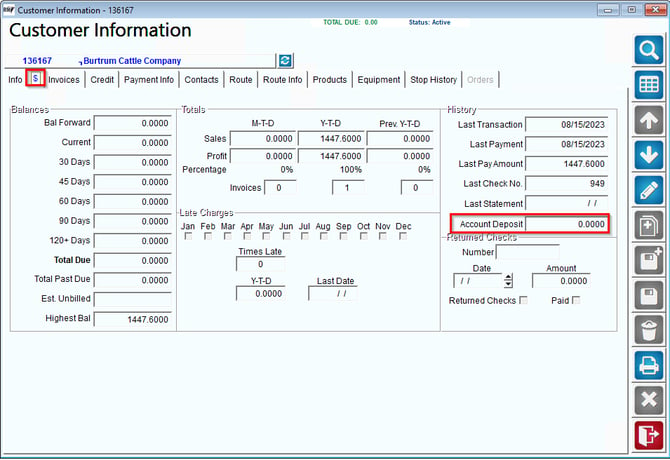
On the Customer Information Screen, navigate to "$" tab and view the Account Deposit.
Report
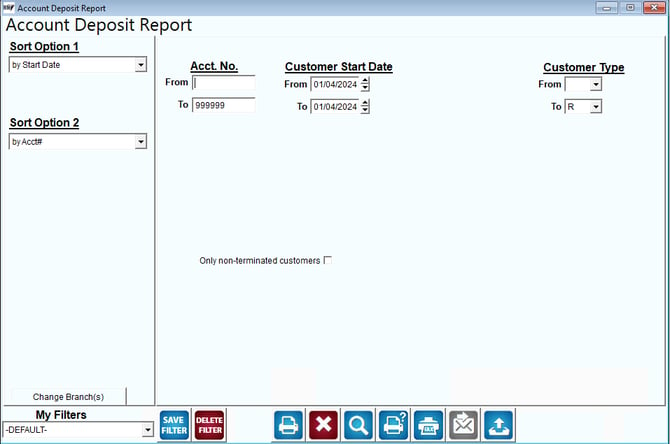
This report includes deposit totals entered in the Deposit field within Customer Information, on the Finance tab. The Account Deposit Report can be found under Reports>Accounting Reports>Customer>Account Deposit Report.
NOTE: The Deposit field is updated each time a product is sold with the ‘Update Account Deposit’ flag checked within Product Charge Codes. This option is typically used for miscellaneous deposits (e.g., equipment deposit).
Fields:
Sort Option 1 & 2: The primary and secondary fields to sort by. You can choose from the following categories:
- Start Date
- Account Number
- Customer Name
- Customer Type
- Major Account Code
Change Branch: If you are logged into multiple branches, this option may be shown and allows you to re-select the branches to include in the report instead of having to completely exit the report.
Acct No: Enter the range of accounts to include on the report.
Start Date: Enter the range of customer start dates to appear on the report.
Customer Type: Select the range of customer types to include on this report.
Only Non-Terminated Customers: Check this box to filter out all inactive accounts.